If you’re like me and love collecting data for automation, and also love filling your home with fish and plants, you’ve likely wondered if there is a way to connect your aquarium to HomeAssistant.
In this case we use ESPHome and some basic hardware with a 3D printed case to create an aquarium friendly sensor and set up some notifications. This assumes you have ESPHome set up and know the basics for creating custom devices and are able to solder; the case requires access to a 3D Printer or creativity and duct tape.
Hardware List:
- ESP8266 (~$3-$5 on AliExpress)
- You can use an ESP8266, ESP32, or ESP-01 but this case design is for the ESP8266 on the Wemos D1 Mini board, and the ESP-01 usually does not have enough memory for OTA updates and requires an external programmer.
- DS18B20 Temperature Sensor Kit (~$3 on AliExpress)


Code:
#Sources:
# https://esphome.io/components/sensor/dallas.html
esphome:
  name: "30gallon-aquarium-sensor"

esp8266:
  board: d1_mini

# Enable logging
logger:

# Example configuration entry
dallas:
  - pin: D3

# Individual sensors
sensor:
  - platform: dallas
    address: 0x85000000161dee28
    name: "30G.HOB.Sensor"

# Enable Home Assistant API
api:
  encryption:
    key: "123456789123456789123456789123456789123456789"

ota:
  password: "123456789123456789123456789"

wifi:
  ssid: !secret wifi_ssid5
  password: !secret wifi_password5
This uses the Dallas sensor component in ESPHome. You will likely see a different sensor address at first, which will require reprogramming. I highly recommend using the ESP8266 or ESP32 with enough memory for OTA updates because of this; it just makes life easier.

Case:
I created this model in Fusion 360. The gap is large enough to fit over the lip of a normal rimmed aquarium, at least up to 30 Gallons. Larger aquariums with thicker rims may need adjustment or some reshaping with heat.

I use a Creality Ender 3 Pro, a budget friendly printer which does decently with PLA but not great with ABS without a cover of some sort. My cases were all printed with regular PLA.
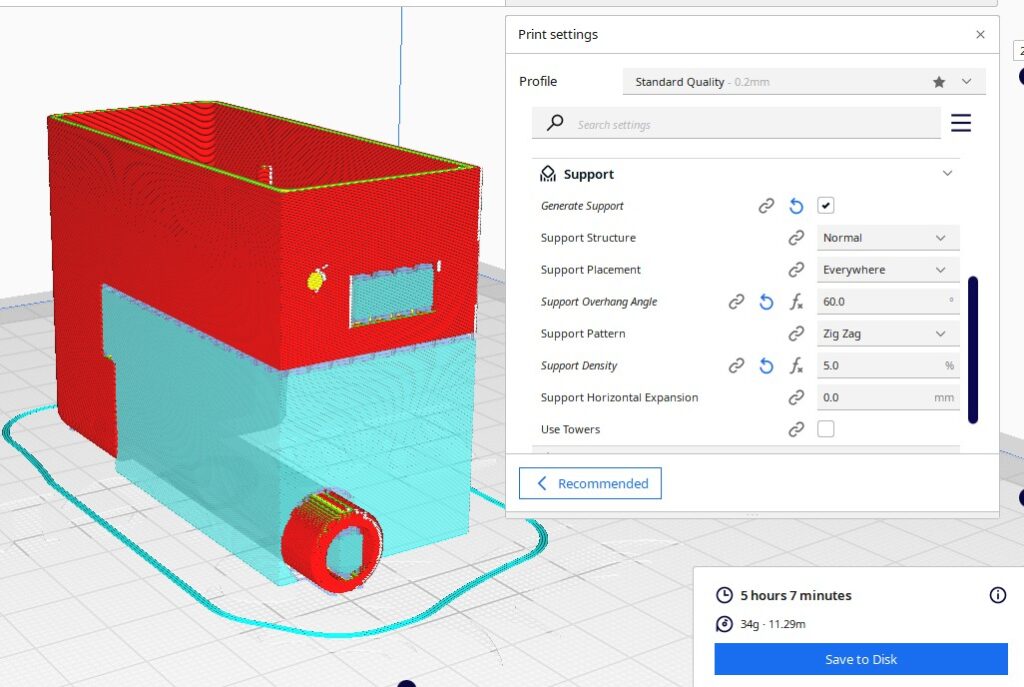
I recommend orienting the base face down and reducing the support settings; in Cura you can open Settings Visibility and enable more Support options, reducing the density for example. Because of the weird angles this has been the best printing option I have found without cutting off the sensor neck. Every printer is different though so it may take some adjustments to get the best result for you.

Putting It Together
Once you have the hardware and case ready, remove the supports, slide the sensor up the case neck, trim the cables, and wire everything up. I chose to dip my sensor/neck in liquid silicone to water proof things. Once everything is jammed in there you the USB port should line up with the opening, providing enough space for a USB cable to power the device.


Also a snail.


Home Assistant
At this point you should be able to connect it to HomeAssistant, add it to your dashboards, whatever you will do.

I also set up a warning notification if the temperatures in my tanks go out of range. I use Node-Red like this:

I have a maintenance button that will turn off notification checks for an hour and a half; if I’m doing water changes I don’t want notifications.
var states = global.get('homeassistant.homeAssistant.states');
var temp5G = states["sensor.5g_hob_sensor_2"].state;
var temp10G = states["sensor.10g_hob_sensor"].state;
var temp30G = states["sensor.30g_hob_sensor"].state;
//Values
var warningHighTemp = 80.5;
var warningLowTemp = 75;
var emergencyHighTemp = 82;
var emergencyLowTemp = 72;
msg.payload = "";

//temp10G = 40; //override test


if (temp5G < emergencyLowTemp || temp5G > emergencyHighTemp) {
    msg.payload = msg.payload + "Emergency, 5 Gallon aquarium is out of range! " + temp5G + " degrees!";
} else if (temp10G < emergencyLowTemp || temp10G > emergencyHighTemp) {
    msg.payload = msg.payload + "Emergency, 10 Gallon aquarium is out of range! " + temp10G + " degrees!";
} else if (temp30G < emergencyLowTemp || temp30G > emergencyHighTemp) {
    msg.payload = msg.payload + "Emergency, 30 Gallon aquarium is out of range! " + temp30G + " degrees!";
} else if (temp5G < warningLowTemp || temp5G > warningHighTemp) {
    msg.payload = msg.payload + "Warning, 5 Gallon aquarium is out of range! " + temp5G + " degrees!";
} else if (temp10G < warningLowTemp || temp10G > warningHighTemp) {
    msg.payload = msg.payload + "Warning, 10 Gallon aquarium is out of range! " + temp10G + " degrees!";
} else if (temp30G < warningLowTemp || temp30G > warningHighTemp) {
    msg.payload = msg.payload + "Warning, 30 Gallon aquarium is out of range! " + temp30G + " degrees!";
} else
    msg.payload = "All good!"

return msg;
I haven’t taken a coding class in over a decade and learning to optimize my functions hasn’t been a priority, so don’t judge. The long story short is that every few minutes (if Maintenance is off) the JavaScript function checks each tank’s temperature against the lows and highs I have set with the above code.


It passes the results to a switch which ignores the “All good!” message, directs warnings to a Push notification link, and Emergencies to a Push notification link as well as a function that will pass the message to the Google Nest Minis we have in every room that has detected occupancy, ensuring that emergencies will wake us up or other. TTS will announce exactly what tank and temperature set off the warning. Triggers prevent the notifications from occurring constantly once activated.
If you haven’t switched to Node Red yet, I highly recommend it; the ability to link automations alone is worth it.
That’s really all there is to it. Please do not take this design and and try to sell it online, STLs are protected by copyright and eventually I’ll figure out the right disclaimer to add.