
When it comes to self-hosting, having services available by their IP address and port number can be a hassle to keep track of. A much more practical solution is to use a Reverse Proxy, which receives requests for a site and acts as an intermediary to connect your request to the right server.
What is a Nginx Reverse Proxy?
A Nginx reverse proxy server is a powerful tool that’s designed to handle large volumes of traffic while keeping your infrastructure organized. As a web server tool, it’s often used for hosting websites directly, but its capabilities don’t stop there. With Nginx’s Proxy Pass configuration, you can pass requests to another URL or IP/port combination – even implement load balancing.
Why Choose Nginx as Your Reverse Proxy?
There are many reasons why Nginx is a top choice among web developers and sysadmins. Some of the key benefits include:
- High performance : Nginx is designed to handle large volumes of traffic while keeping your infrastructure organized.
- Load balancing : With Nginx, you can easily implement load balancing to distribute traffic across multiple servers.
- SSL termination : Nginx makes it easy to terminate SSL certificates and ensure secure connections between clients and servers.
Prerequisites
- Domain Registration : You should have a registered domain name (e.g., aadsit.com) and ensure that it is correctly pointed to your server. If you have a dynamic IP address I highly recommend setting up a dynamic DNS client!
- Public IP Address : Your server should have a publicly accessible IP address (i.e., not behind a Carrier Grade NAT or firewall ISP).
- Proxmox/Networking Setup : Familiarity with Proxmox or other virtualization software, as well as basic networking concepts (e.g., subnets, ports, etc.) is assumed.
Setting Up a Nginx Reverse Proxy Server with Certbot
In my setup, I use two separate Nginx servers: one handles public-facing traffic, while the other is for internal-only traffic. This post focuses on setting up the public-facing Nginx reverse proxy server using Certbot to obtain Let’s Encrypt certificates. By following this guide, you’ll learn how to:
- Set up a Nginx reverse proxy server
- Obtain free SSL certificates from Let’s Encrypt using Certbot
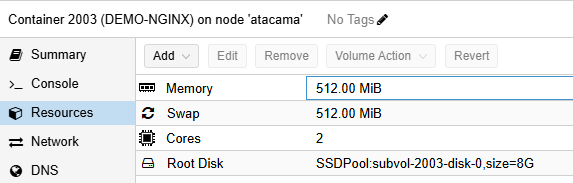
To begin we will discuss our lab environment and dive into creating a host for our server. At home I run a Proxmox cluster with High Availability, with most of my servers being virtual machines. In this demo, we will be setting up an individual LXC container for low overhead and quick setup.
The host server is “Atacama”:
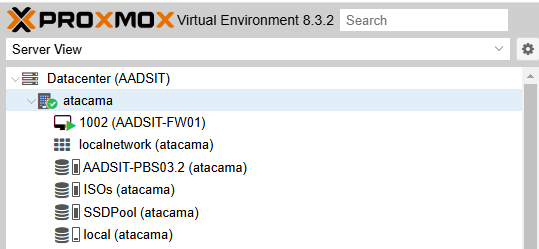
This article doesn’t cover Proxmox or networking basics and assumes you have these covered. We will create a new LXC container for our demo. I’m using the ubuntu-22.04-standard image as that is what I have readily downloaded.
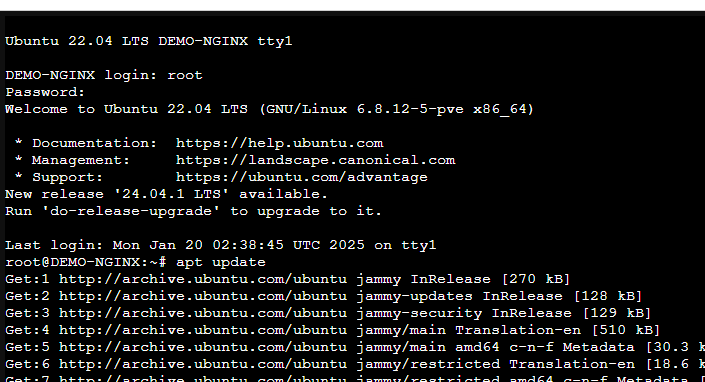
We will get signed into the server and run apt-update to get a list of current packages
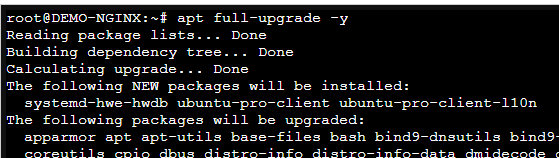
It’s good practice to get everything updated before continuing, so we will go ahead and run apt full-upgrade -y
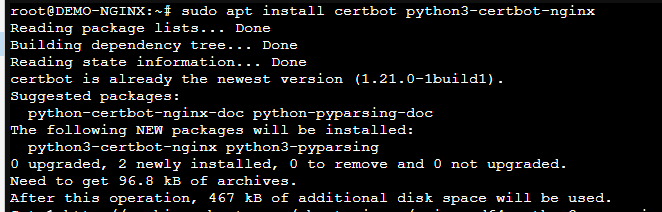
Now that everything is updated we will install Nginx and Certbot, including the module for certbot to interact with Nginx.
Now that the packages are installed, we need to enable Nnginx to run as a service with “sudo systemctl enable nginx”, and then start the service after.

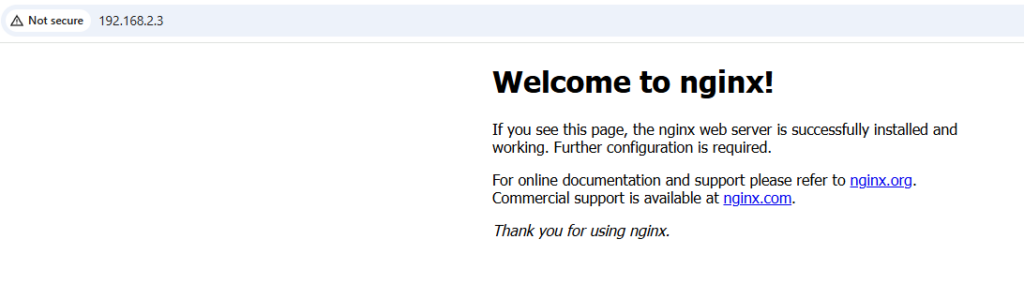
Our server is sitting at 192.168.2.3. Specifying HTTP, NOT HTTPS, we see a welcome screen!
As the focus of this is on setting up a reverse proxy, let’s next discuss our target. I choose to have a different virtual machine run Docker, hosting websites and similar services in a containerized environment. Without going into the details, this provides easy snapshotting, backups, and even high-availability and live migrations when I do server maintenance. This server is at 192.168.2.8, and I have a WordPress website running on port 9080. We can set up a basic Proxy in Nginx by creating a new file in /etc/nginx/sites-available, such as “demo”. I like to use the full name for my configuration files, and this will be a sub domain of aadsit.com, so I will call this “demo.aadsit.com”. The text in the “Demo.aadsit.com” file:
server {
    server_name demo.aadsit.com;
    listen 80;
    location / {
        proxy_pass http://192.168.2.8:9080;
        client_max_body_size 800M;

        proxy_set_header Upgrade $http_upgrade;
        proxy_set_header Connection "upgrade";
        proxy_set_header Host $host;
        proxy_set_header X-Real-IP $remote_addr;
        proxy_set_header X-Forwarded-For $proxy_add_x_forwarded_for;
        proxy_set_header X-Forwarded-Proto $scheme;
        proxy_set_header X-Forwarded-Host $host;
        proxy_set_header X-Forwarded-Port $server_port;
    }


}
Explained
Server Block
server { : Starting point for an individual server block.
server_name demo.aadsit.com;: Specifies the domain name that this server block should respond to.
listen 80;: Tells nginx to listen on port 80 (the standard HTTP port).
Location Block
location / {: Specifies the URL path or pattern that should be handled by this server block (in this case, requests made to/).proxy_pass http://192.168.2.8:9080;: Forwards incoming traffic to a service located athttp://192.168.2.8:9080.client_max_body_size 800M;: Sets the maximum body size that can be transferred from the client to 800 megabytes. This can be any value, I usually set it to at least a few MB.
Proxy Header Settings
These settings preserve and manipulate information about the original request:
proxy_set_header Upgrade $http_upgrade;&proxy_set_header Connection "upgrade";: Set up headers for WebSockets upgrades- Copying specific headers from the original request to the proxied server:
proxy_set_header Host $host;proxy_set_header X-Real-IP $remote_addr;proxy_set_header X-Forwarded-For $proxy_add_x_forwarded_for;proxy_set_header X-Forwarded-Proto $scheme;proxy_set_header X-Forwarded-Host $host;proxy_set_header X-Forwarded-Port $server_port;
After creating the configuration file, you have to link it into the sites-enabled folder. You can do this with “ln -s” to create a soft link, as shown below. This is a common way of implementing configuration files, as it allows you to update a file in one spot and be reflected in multiple spots, or otherwise unlink a file without deleting it. I use a script to link all .com and similar website configuration files in one go.

After that let’s restart Nginx with systemctl restart nginx

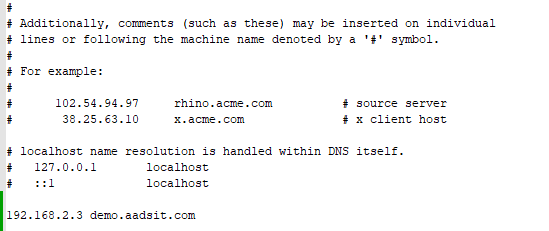
Now NGINX is listening and will pass traffic to the target server! We can test this internally by adding “demo.aadsit.com” to our hosts file, as shown (in Windows):
“You might realize now that your reverse proxy is only reachable internally. That may be a good stopping point for some people, but our goal is to make this externally available! If you’re just setting up an internal-only reverse proxy and don’t need public HTTPS encryption, you can consider it complete. However, if you want publicly signed certificates for your website (for HTTPS encryption), the easiest way that we’ve already set ourselves up for is to use Let’s Encrypt via Certbot!
Note: Alternatively, if this is an internal-only reverse proxy, visitors can use a certificate signed by a private certificate authority instead. Installing the certificate authority on their computer will allow them to see the website as trusted.
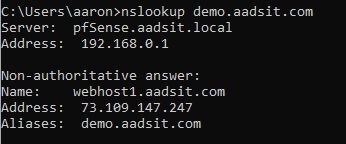
I already have DNS in place for demo.aadsit.com to reach my external IP address:
The next step is to set up SNAT or Port Forwarding on my firewall to direct traffic to the server. In my case, I use Aliases as much as possible, and have an alias “WebTraffic_Ports” with port 80 and 443, HTTP and HTTPS respectively. Both are important to have! Your specific situation may vary, and if you do not have a public IP address you will not be able to do this. (Note: if you also use PfSense or other more-capable firewalls, you may need to find and enable the settings for “NAT Reflection” to reach websites internally. )

Once we have external access to our website set up, let’s get some certificates generated! On our demo server we will run “certbot –nginx”
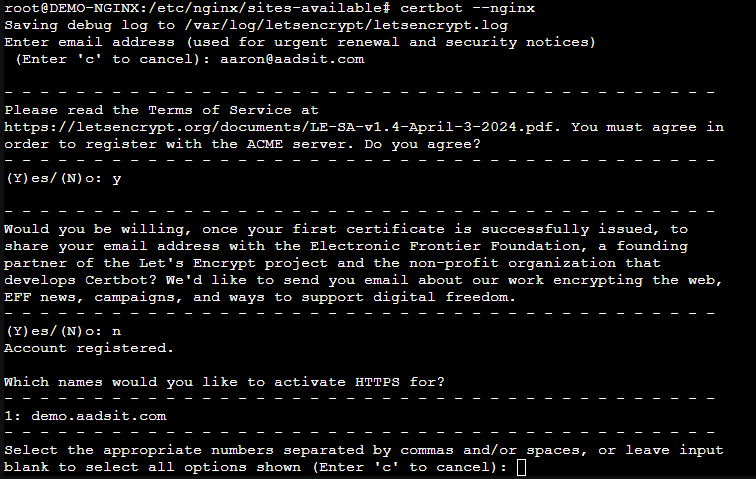
You will be prompted to answer several questions, and then given a list of server names found in your configuration files. If you have multiple sites being hosted, you can submit a request for all of them in one go. It will then provide a single certificate with all sites included as “subject alternative names”.
The next step is to set up SNAT or Port Forwarding on your firewall to direct traffic to the server. However, this step may fail if port 80 is not forwarded to your server correctly! You may also encounter issues if you have geo-blocking or other restrictions in place, which can prevent the Automated Certificate Management Environment (ACME) protocol used by Certbot from completing.
If everything goes well, Certbot will automatically generate the certificate with LetsEncrypt and update your configuration file!
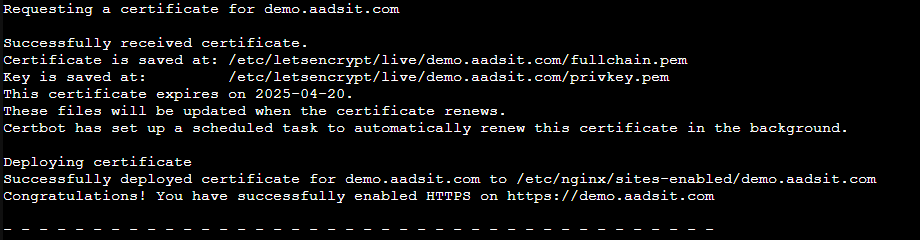
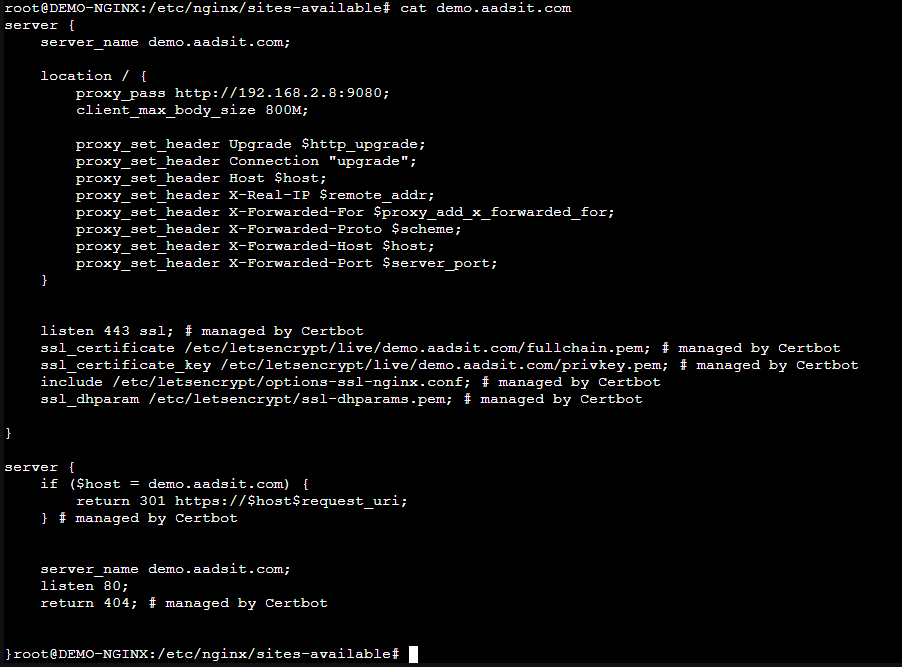
You can see that now we have a section listening to port 80 which replies with a redirect to our site with HTTPS, and now it listens at 443 with the letsencrypt certificate!
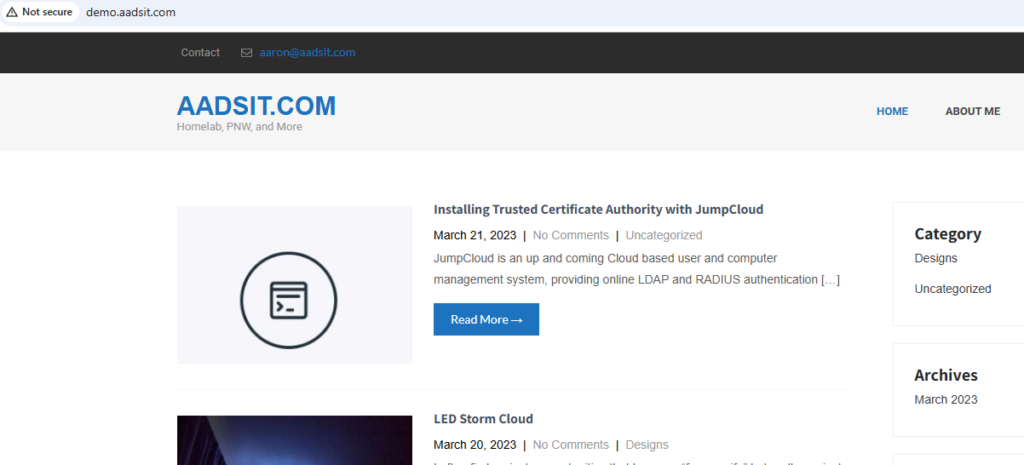
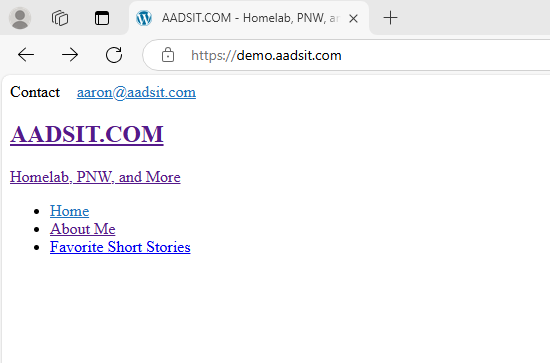
Finally, try going to your site (ensure you’ve removed the hosts file entry or local dns if you tried it!) and ensure that you are redirected to HTTPS. In this case, DEMO.AADSIT.COM is failing to load images resources as they are actually at AADSIT.COM, which is offline while I do this demonstration. 🙂
In this article, we’ve covered the basics of setting up a Nginx reverse proxy server on an LXC container using Proxmox as our virtualization platform. We walked through the process of obtaining free SSL certificates from Let’s Encrypt using Certbot, setting up a basic Nginx configuration to proxy requests to the target server, and configuring the target server to receive traffic.
And that’s it! With these steps, you should now have a functional reverse proxy setup using Nginx on an LXC container running on Proxmox. This is just the tip of the iceberg – there are many ways to customize and optimize your reverse proxy setup for your specific needs.
Thanks for reading, and happy self-hosting!
Created with my co-editor Llama3.1 8b running on an Nvidia P4, which was a lot of fun!